Home > USB Central > USB OTG and Embedded Hosts > BeagleBoard Code for Accessing USB Devices > Using Eclipse to Cross-compile Applications for Embedded Systems
Using Eclipse to Cross-compile Applications for Embedded Systems
Jan Axelson
Part 1: Install a Toolchain
Part 2: Install Eclipse and C/C++ Development Tools
Part 3: Create and Configure a Project
Part 4: Compile and Run an Application
Part 5: Set Up Remote Debugging
Click the images to enlarge.
Send comments, suggestions, etc. to jan (at) janaxelson.com.
Part 5: Set Up Remote Debugging
You can run and debug BeagleBoard programs using remote debugging on a development PC that is in the same local network as the BeagleBoard.
This tutorial assumes you have installed Eclipse and the C/C++ Development Tools and you have created the example project hello_world with a debug configuration.
Debugging tip: on multiple occasions, I was able to fix problems or remove an Eclipse error message by clicking Project -> Clean or sometimes by exiting Eclipse and running eclipse -clean.
Install and Configure Remote Debugging Capabilities
On the Development PC
Run Eclipse and select Help -> Install New Software. In the Work with window, select All Available Sites.
Under Name, expand Mobile and Device Development and select these items:
C/C++ DSF GDB Debugger Integration
C/C++ Remote Launch
Remote System Explorer End-User Runtime
Remote System Explorer User Actions
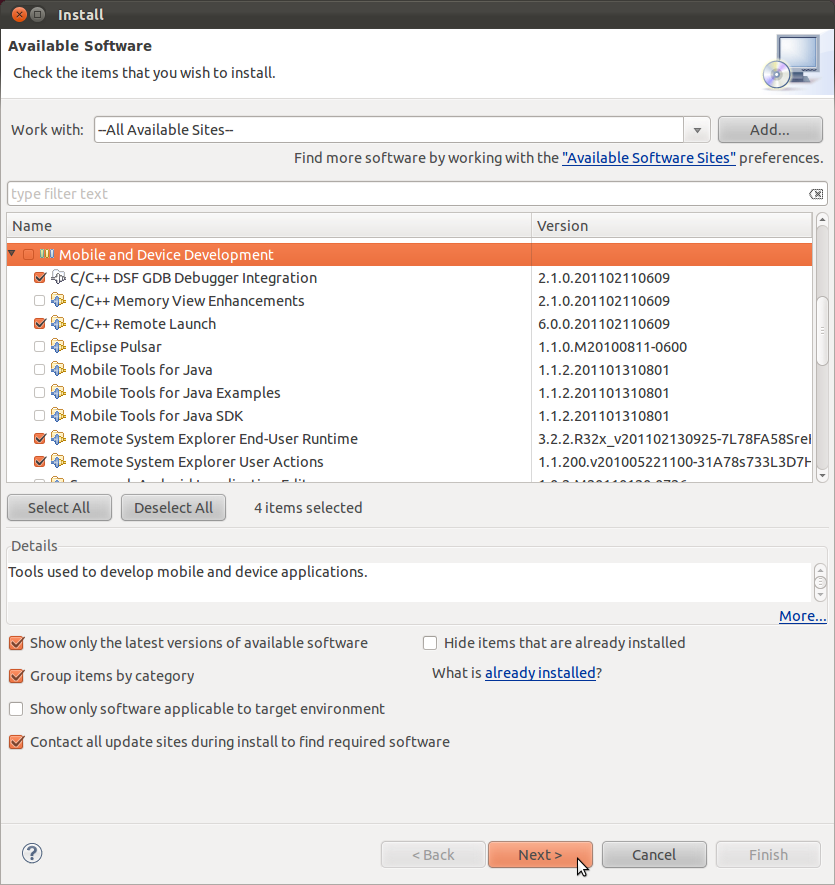
Click Next, and view the Install Details, which tells you if any of the selected items are already present.
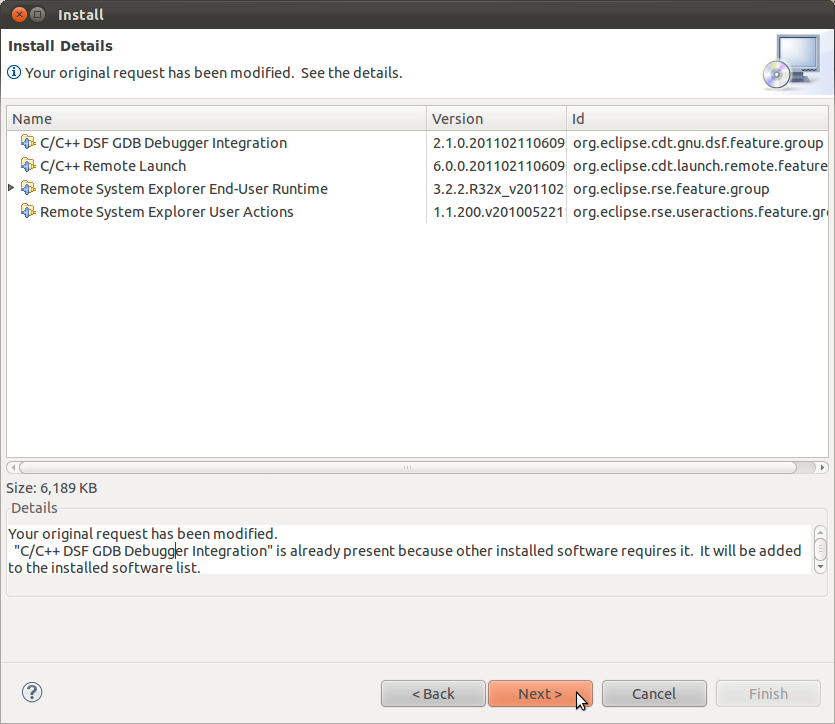
Click Next.
Accept the terms of the license agreement and click Finish.
Click Restart Now.
On the BeagleBoard
In a Terminal application, get the BeagleBoard's IP address by entering:
ifconfig
In this example, the IP address is 102.168.1.79
usb0      Link encap:Ethernet  HWaddr 96:df:6b:90:cc:c1
          inet addr:192.168.1.79  Bcast:192.168.1.255  Mask:255.255.255.0
On the development PC
Add the IP address to the /etc/hosts file.
To do so, in a Terminal application, enter
sudo gedit /etc/hosts
In gedit, add the BeagleBoard's IP address to the file:
192.168.1.79 beagleboard
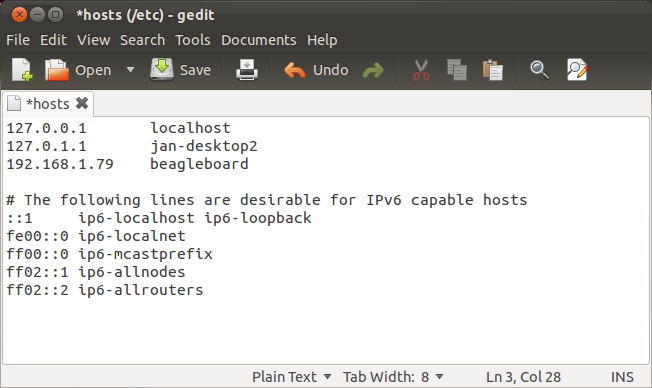
Click Save and close gedit.
To test the connection, in a Terminal application on the development PC, enter:
ping beagleboard
You should see something like this:
PING 192.168.1.79 (192.168.1.79) 56(84) bytes of data.
64 bytes from 192.168.1.79: icmp_req=1 ttl=64 time=0.985 ms
64 bytes from 192.168.1.79: icmp_req=2 ttl=64 time=0.958 ms
Press Ctrl+C to quit the ping command.
On the BeagleBoard
Install gdbserver if not already installed:
sudo apt-get install gdbserver
(For Angstrom systems, use opkg install gdbserver)
Install ssh if not already installed:
sudo apt-get install ssh
(For Angstrom systems, use opkg install ssh)
On the Development PC
In a Terminal application, enter
ssh beagleboard
If asked Are you sure you want to continue connecting (yes/no)?, enter
yes
If necessary, on the BeagleBoard, create the directory that will store the project's executable file:
mkdir /home/jan
Set up a Project for Remote Debugging
To set up a project for remote debugging, you need to create a connection and configure a Debug Configuration.
Create a Connection
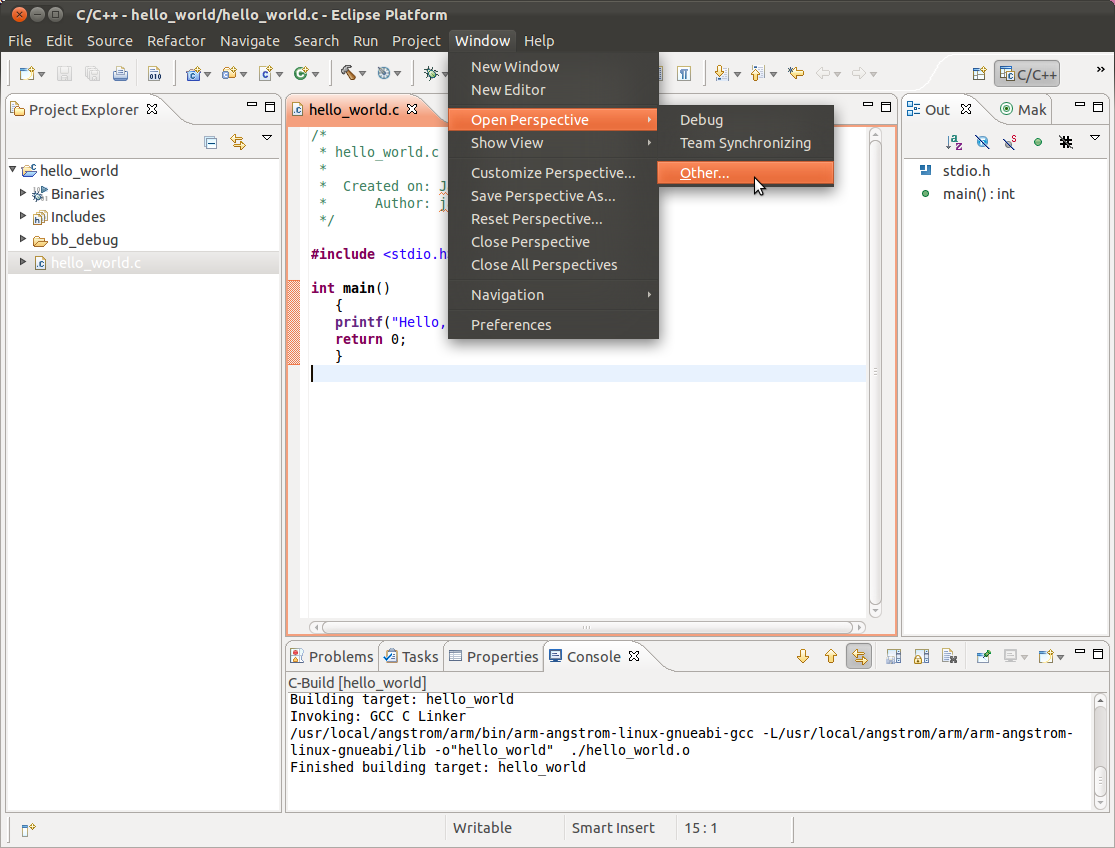
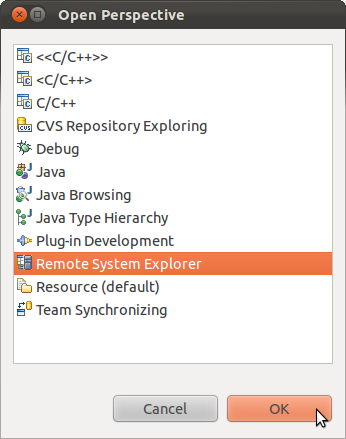
In Eclipse, click Window -> Open Perspective -> Other
Select Remote System Explorer and click OK.
Click File -> New -> Other. In the window that appears, double-click Remote System Explorer to expand it and select Connection.
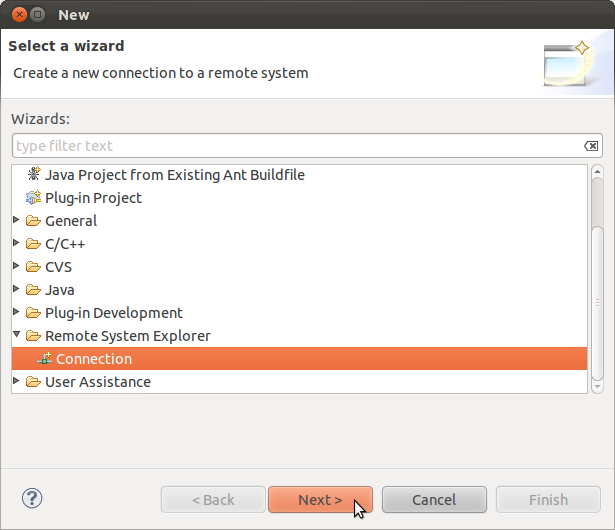
Click Next. Select Linux.
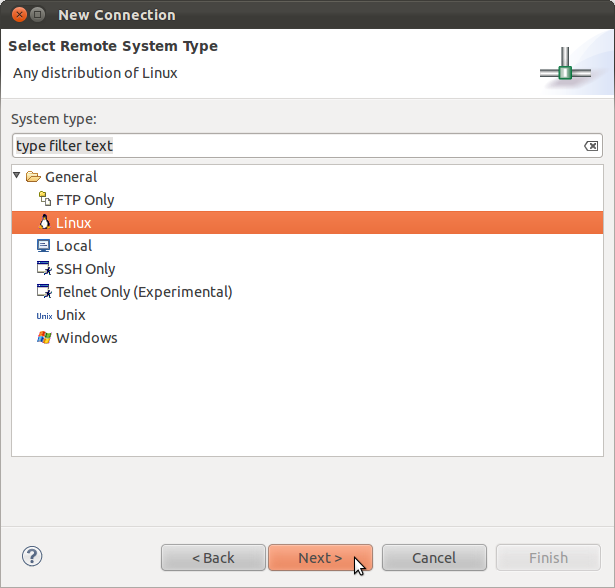
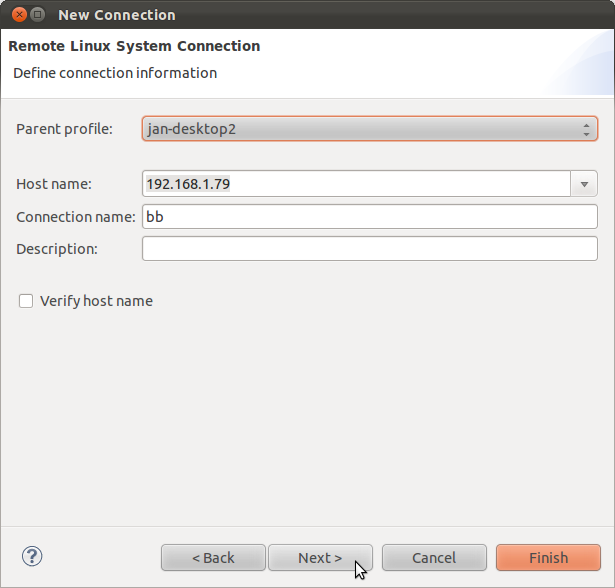
Click Next. At Host name, enter the IP address of the BeagleBoard (192.168.1.79 in the example).
At Connection name, enter a name for the connection (bb in the example).
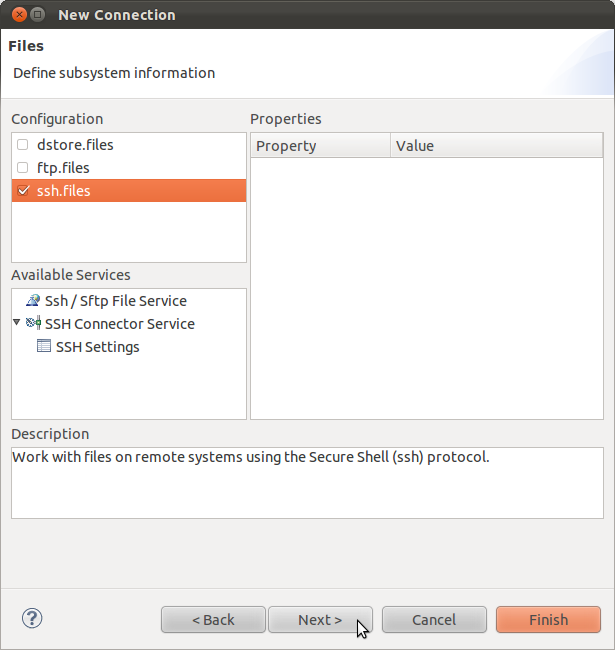
Click Next. Under Configuration, select ssh.files.
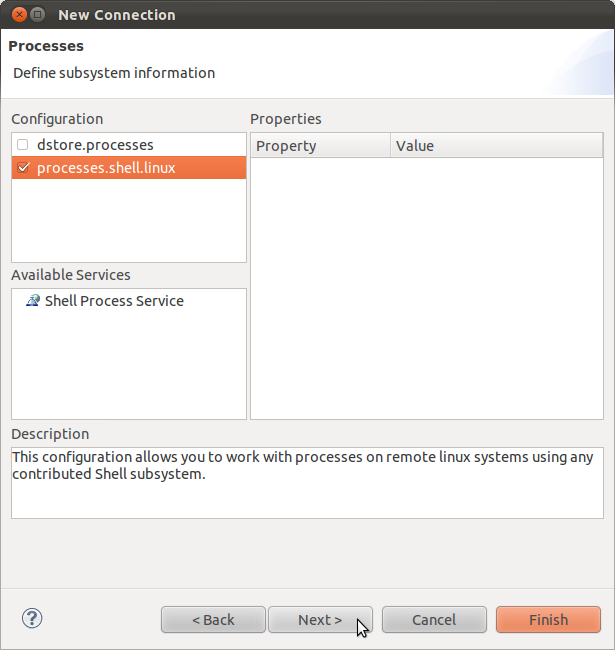
Click Next. Select processes.shell.Linux.
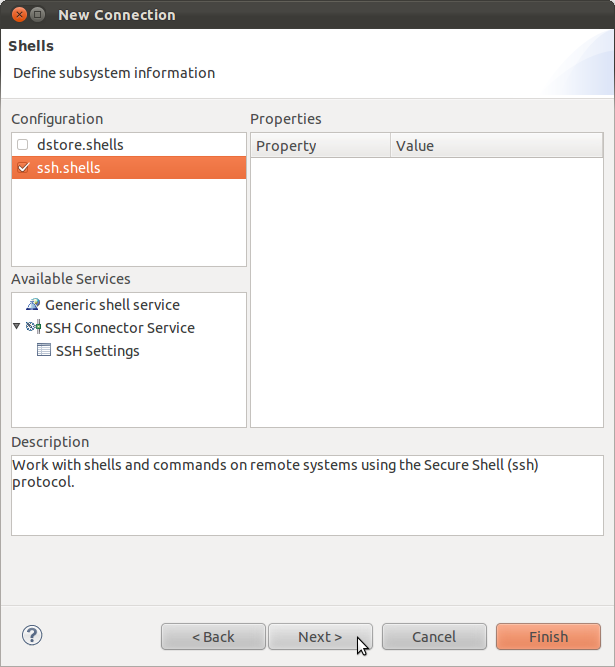
Click Next. Select ssh.shells.
Click Next. Select ssh.terminals.
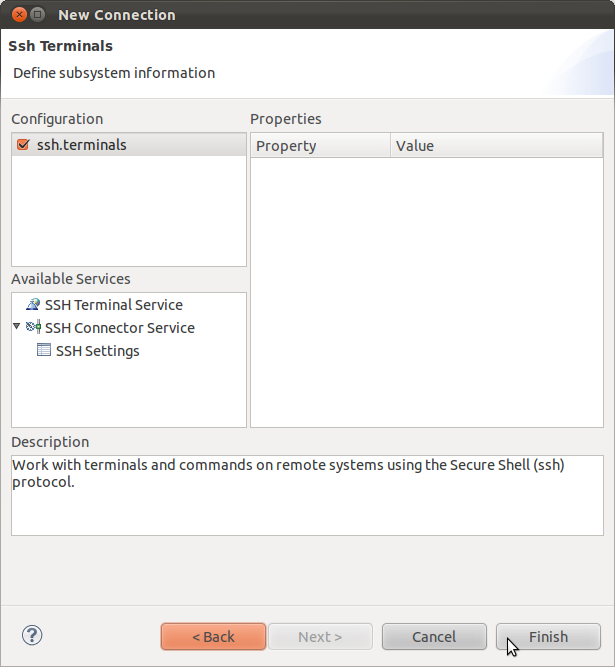
Click Finish. In the Remote Systems tab, right-click the connection and select Properties.
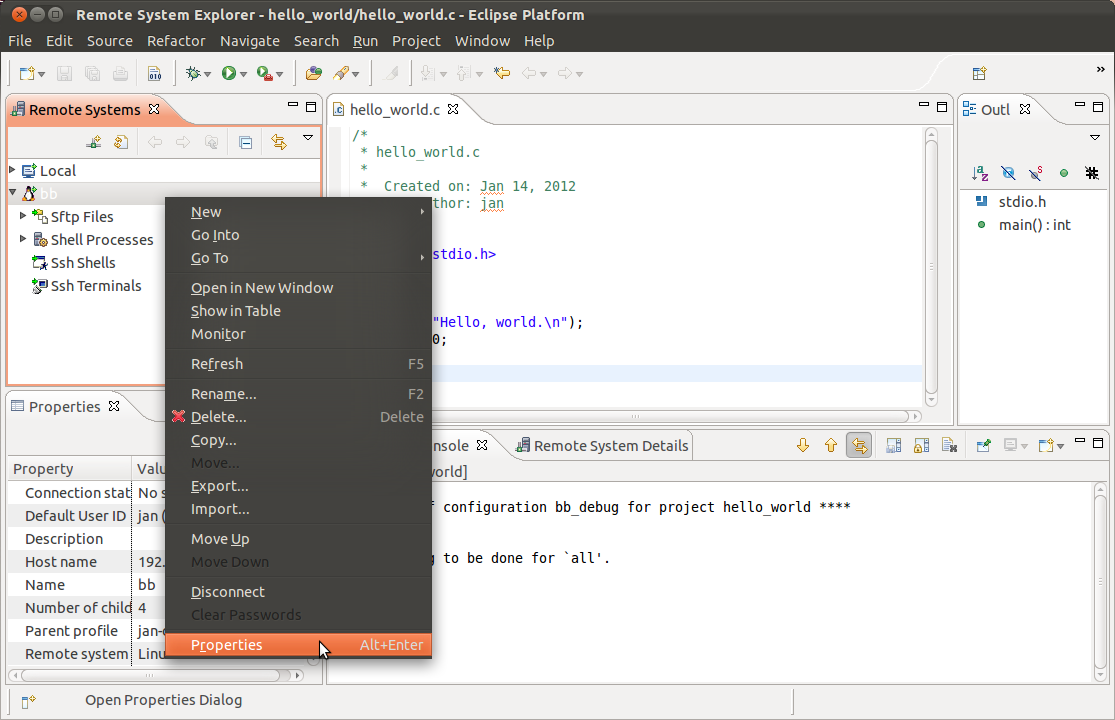
Optional: set the connection's user to root: click Host. Click the small icon just to the right of Default User ID and enter root.
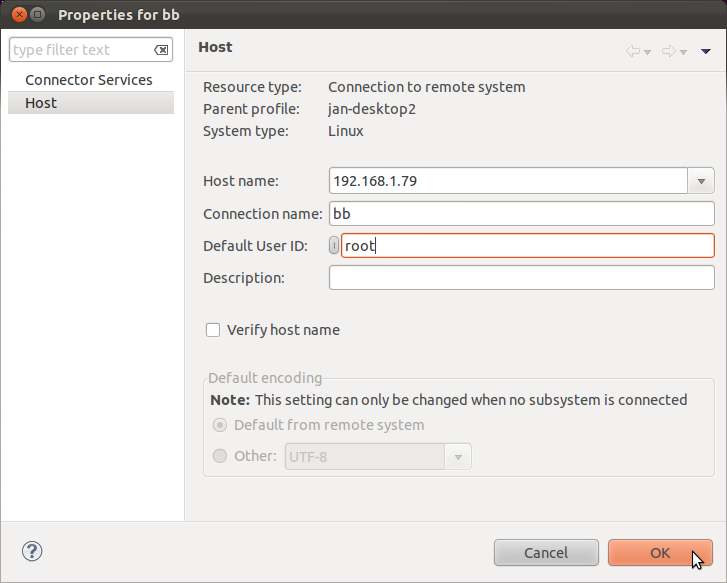
Click OK.
If you need to edit the connection later on, select Window -> Open Perspective -> Other -> Remote System Explorer. Under Remote Systems, right-click the connection name and click Properties.
Create .gdbinit
In a Terminal application on the development PC, go to the project's home directory:
cd /home/jan/hello_world
and create an empty file by entering:
touch .gdbinit
To view all files (including the hidden .gdbinit file) in a directory, enter
ls -a
Set up the Debug Configuration
In Eclipse, select Run -> Debug Configurations.
Under C/C++ Remote Application, select your launch configuration (hello_world bb_debug).

In the Main tab, at Connection, select the connection you create above (bb in the example).
At Project, select the hello_world project you created earlier.
At Build Configuration, select Use Active, which should be set to the bb_debug Build Configuration you created earlier.
At C/C++ Application, browse to the hello_world executable file you created earlier.
At Remote Absolute File Path for C/C++ Application, browse to or enter the directory and the filename where you want to upload the executable file on the BeagleBoard, for example:
/home/jan/workspace
At Commands to execute before application, enter chmod 777 followed by the location of the uploaded executable file on the BeagleBoard:
chmod 777 /home/jan
Click Apply.
Select the Debugger tab.
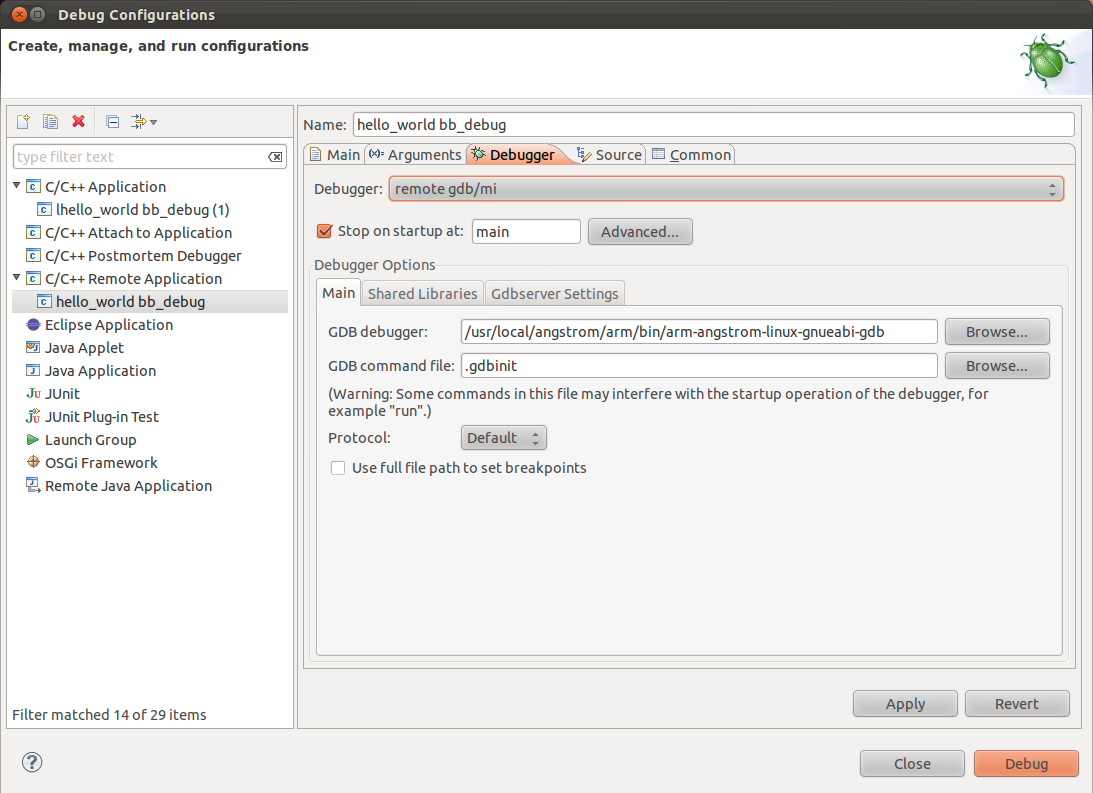
At GDB debugger, enter:
/usr/local/angstrom/arm/bin/arm-angstrom-linux-gnueabi-gdb
or the location of arm-angstrom-linux-gnueabi-gdb on your development PC if different.
Caution: when I inadvertently added a space after the debugger name and path, on attempting to debug, I got this error:
Error creating session
Cannot run program "/usr/local/angstrom/arm/bin/arm-angstrom-linux-gnueabi-gdb ": Unknown reason
Note that the default settings select Stop on startup at: main, which means that when you run the debugger, it will stop at the first line in main.
Under Debugger Options, select the Gdbserver Settings tab. At Port number, enter a free TCP port (2345 in the example).
Click Apply.
Start Debugging
Click Debug.
If asked to Confirm Perspective Switch, click yes.
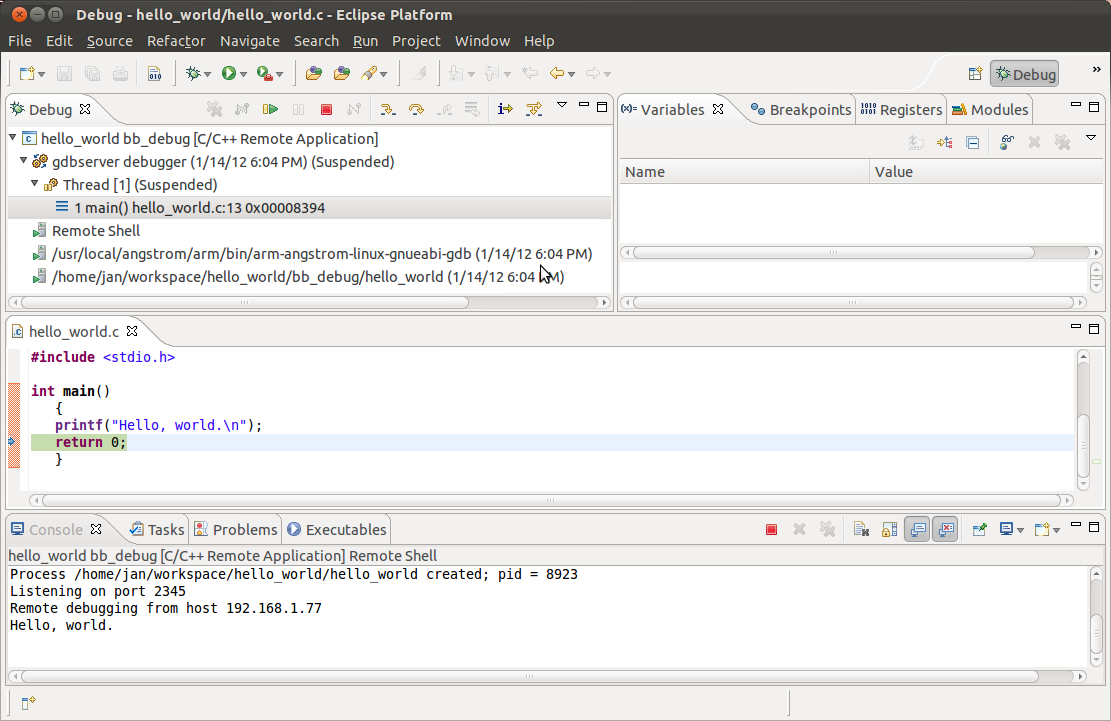
Eclipse should now upload hello_world to the BeagleBoard and begin remote debugging. With the default setting to Stop on startup at main, you should see the program stopped at the first program line.
Press F6 on the development PC's keyboard and the program will advance one line.
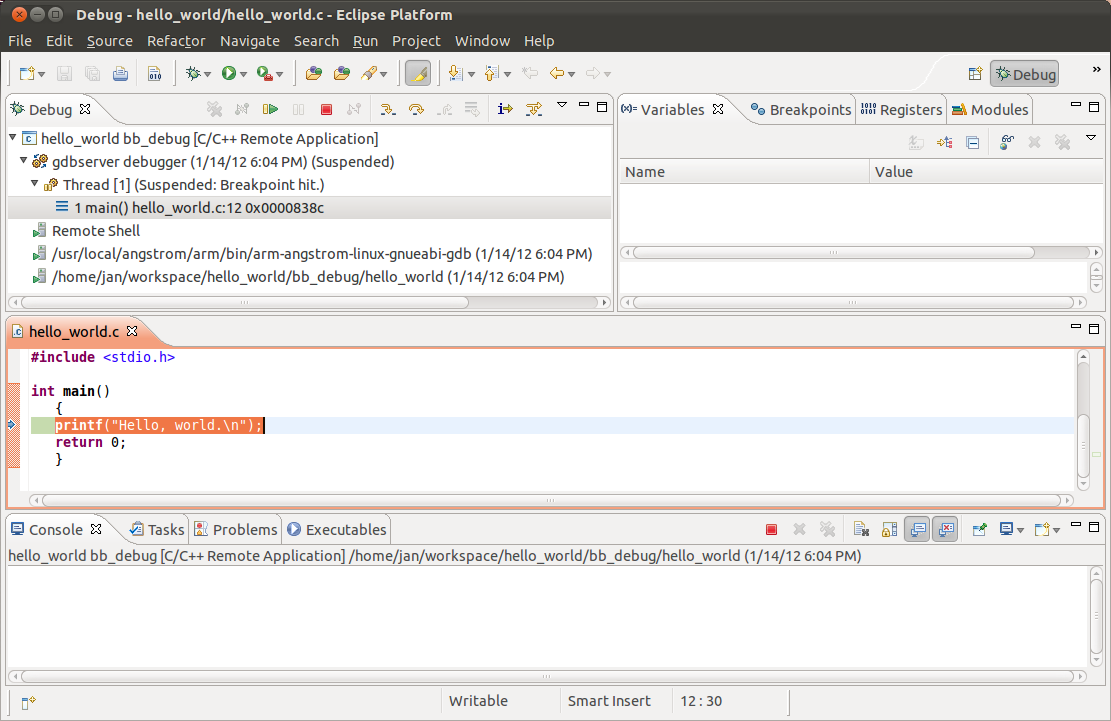
The printf output should appear in the Console tab in Eclipse:
Hello, world.
On the BeagleBoard, you can verify that the program is running by viewing its process number:
pidof hello_world
10878
In Eclipse, click Run -> Resume to continue executing the program.
See the Run menu for other debugging commands.
To return to the previous C/C++ perspective, select Window -> Open Perspective -> C/C++.
Create More Projects
You can use the project, debug configuration, and connection you created as templates for other projects.
To create a new project, in Eclipse, right-click the project name (hello_world in the example) and click Copy. Right-click again and click Paste. In the Copy Project window that appears, enter a name for the new project. Edit the project's settings as needed.
To create a new launch configuration, select Run -> Debug Configurations. Under C/C++ Remote Application, right-click your existing launch configuration (hello_world bb_debug in the example) and select Duplicate. In the new launch configuration, edit the settings as needed for your new project.
A new project that connects to the same remote system can use the same connection (bb in the example).