Home > USB Central > USB OTG and Embedded Hosts > BeagleBoard Code for Accessing USB Devices >BeagleBone Getting Started Guide
BeagleBone Getting Started Guide
Jan Axelson
If you have a BeagleBone and would like to start using it, or if you are interested in programming small systems that use Linux, this guide is for you. The focus is on getting a development system up and running so you can write and run your own programs on the 'bone. I've tried to include some of the whys behind the how-tos so you understand not just how to do it but why it works.
Options for Communicating with the BeagleBone
The BeagleBone is a single-board computer that comes with a mini-SD card containing an Ångström distribution of Linux. The Ångström distribution is tailored for use in small systems.
Unlike a PC, the 'bone doesn't come with a keyboard and display for executing commands and running programs. So how do you load and debug programs?
One way would be to create a mini-desktop system by attaching a USB hub, keyboard, mouse, and a USB display like those from Lilliput. But most small systems don't need all of that hardware.
Another option is to create a development system by linking the 'bone to a PC. You can use the PC's keyboard, display, and other resources to write and compile programs, transfer the programs to the 'bone, and debug. From a terminal application on the PC, you can send commands to execute on the 'bone. When debugging is complete, you can detach the 'bone from the PC and run your application on the 'bone as a standalone system.
Connecting the BeagleBone to a PC
This tutorial assumes you have a PC running Ubuntu or another distribution of Linux.
If you don’t have a Linux PC, you can install Linux as a virtual machine on a Windows PC that has extra disk space. Linux then runs in an application window under Windows. One option is VMWare’s free VMPlayer virtualization software. How-To Geek has instructions on how to install Linux as a virtual machine
If you want to stick with Windows, see adafruit learning system's instructions on how to set up the BeagleBone on a Windows PC.
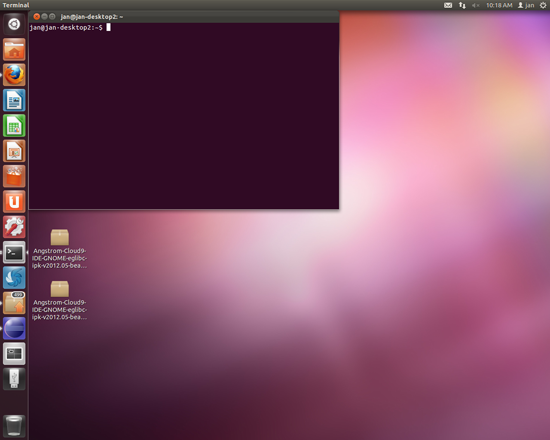
Running a Terminal Application on the PC
This tutorial uses two terminal applications on the PC, one to enter commands on the desktop system and one to enter commands to send to the 'bone.
To open a terminal application on the PC, click the dash home button (the Ubuntu logo) in the upper left, enter terminal in the search box, and press Enter. A window will open with a text prompt. We’ll call this screen the desktop terminal.
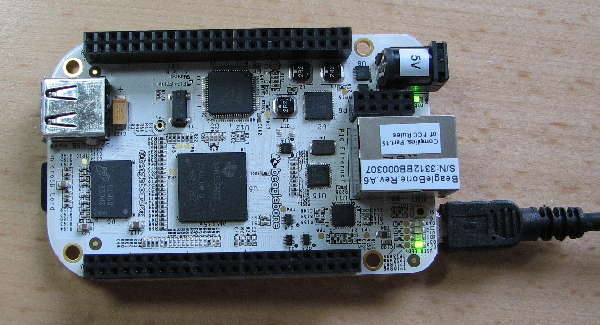
Powering up the BeagleBone
To power up the BeagleBone and boot Linux, insert the provided mini-SD card in the receptacle and use the provided USB cable to attach the 'bone's USB device port to a USB port on your PC.

The BeagleBone's USB Devices
The USB device port's receptable connects to an on-board USB hub with two downstream ports. Each of the hub's ports connects to an on-board USB device. The PC provides power to the 'bone and enumerates the devices to find out what they are and what drivers to use to communicate with them.
Virtual Serial Ports
One of the 'bone's USB devices is an FT2232C Dual USB-UART/FIFO IC. The chip enumerates as a single USB device with two interfaces that can each function as a USB virtual serial port. For each virtual serial port, Linux creates a device node, which is a virtual file that represents the port. To find the device nodes, in the desktop terminal, enter:
ls /dev/ttyUSB*
The ports will likely be the only USB virtual serial ports and will be at /dev/ttyUSB0 and /dev/ttyUSB1. If you see more than two ports, detach the 'bone’s cable and list the ports again. The ports that disappear from the list are the ones that belong to the 'bone.
The FT2232C's serial ports connect to asynchronous serial ports on the 'bone's processor. As you'll see, you can use one of the ports to communicate with a terminal application on a PC. The other port can support JTAG debugging.
Linux-USB File Storage Gadget
The 'bone's other hub port connects to a USB port on the bone's processor, which can emulate the functions of a variety of USB devices.
On first power up, the provided Ångström distribution configures the device on the processor's USB device port as a Linux-USB File Storage Gadget, which functions as an emulated mass-storage device, or drive. Most PCs will mount the drive on attaching the 'bone. To view the drive’s contents, in the desktop terminal, enter:
ls /media/BEAGLE_BONE
If the directory doesn’t exist, find out where BEAGLE_BONE is mounted by entering :
mount
In the response, you should see an entry something like this:
/dev/sdb on /media/BEAGLE_BONE type vfat (rw,nosuid,nodev,uid=1000,gid=1000,
shortname=mixed,dmask=0077,utf8=1,
showexec,flush,uhelper=udisks)
In the example above, /dev/sdb is the device node and /media/BEAGLE_BONE is the device's mount point, where you can access the emulated drive's files.
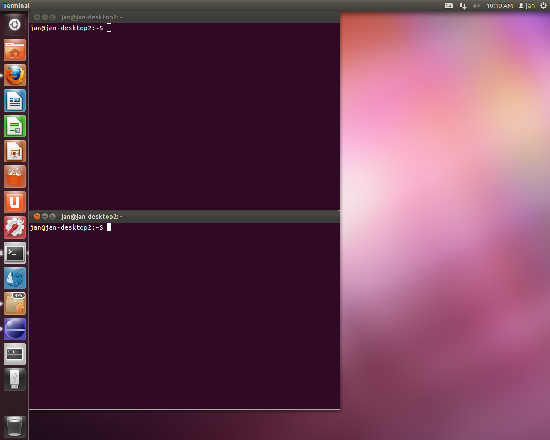
Establishing Communications with the BeagleBone
To open a terminal application for communicating with the 'bone, right-click in the desktop terminal’s window and click Open Terminal. A new window will open. We’ll call this the beaglebone terminal.
To establish communications with the 'bone, in the beaglebone terminal, enter:
screen /dev/ttyUSB1 115200
The screen command creates a virtual terminal for communicating with the device connected to the USB virtual serial port at /dev/ttyUSB1.
115200 is the baud rate for the serial interface that connects to the 'bone's processor chip.
Logging In
Press Enter and you should see the Ångström login screen:

Log in as root. At Password: press Enter. You should see the prompt:
root@beaglebone:~#
If you see this message:
Sorry, could not find a PTY.
detach the 'bone from the PC, restart the host PC, reattach the 'bone, and try again. (Let me know if you have a better solution.) (A PTY is a pseudoterminal.)
If you want to close communications with the 'bone, press Ctrl+A, k and answer “y” to Really kill this window (y/n)?
Once you’ve logged in, if you close the screen, reopen it, and press Enter, the prompt will appear. You don’t have to log in again until you reboot the 'bone.
Executing Commands
Commands you enter in the beaglebone terminal will execute on the 'bone.
For example, to turn on LED usr3 on the 'bone, enter:
echo 1 > /sys/class/leds/beaglebone::
To turn off LED usr3, enter:
echo 0 > /sys/class/leds/beaglebone::
Enabling Ethernet Communications
The USB device port on the processor can also function as a USB/Ethernet bridge. You can use the Ethernet bridge to communicate with a PC instead of using a USB virtual serial port.
Viewing the Ethernet Connection
To view the PC’s existing Ethernet connections, in the desktop terminal, enter
ifconfig
You’ll likely see entries for eth0, the PC’s Ethernet interface, and lo, desktop loopback.
Unloading the Mass Storage Device
Before loading the USB/Ethernet bridge's module, you need to unload the Linux-USB File Storage Gadget module. To view the loaded driver modules, in the beaglebone terminal, enter:
lsmod
In the response, you should see g_mass_storage, which is the Linux-USB File Storage Gadget driver.
To unload the Linux-USB File Storage Gadget module, you request to eject the drive's media on the the PC. In the desktop terminal, enter:
sudo eject /dev/sdx
where sdx is the gadget’s device name as described earlier, for example:
sudo eject /dev/sdb
In response to the eject request, the 'bone unloads the Linux-USB File Storage Gadget module and loads the USB Ethernet Control Module (ECM) gadget module. (If you reload the Linux-USB File Storage Gadget module, then unload it again, you'll need to manually load the ECM gadget module as described below.)
Testing the Ethernet Connection
To view the USB ECM gadget module, in the beaglebone terminal, enter:
lsmod
You should see g_ether, which is the Linux-USB File Storage Gadget module, in the list. The g_mass_storage module should be absent.
In the desktop terminal, enter
ifconfig
You should see a new connection that looks something like this:
eth2 Link encap:Ethernet HWaddr 00:18:31:8d:99:93
inet addr:192.168.7.1 Bcast:192.168.7.3 Mask:255.255.255.252
inet6 addr: fe80::218:31ff:fe8d:9993/64 Scope:Link
UP BROADCAST RUNNING MULTICAST MTU:1500 Metric:1
RX packets:30 errors:0 dropped:0 overruns:0 frame:0
TX packets:44 errors:0 dropped:0 overruns:0 carrier:0
collisions:0 txqueuelen:1000
RX bytes:6377 (6.3 KB) TX bytes:9308 (9.3 KB)
inet addr is the IP address the PC uses to communicate with the 'bone. In the example above, the address is 192.168.7.1.
To find the IP address the 'bone is using, in the beaglebone terminal, enter
ifconfig
If the 'bone is using 192.168.7.2, at the desktop terminal, enter:
ping 192.168.7.2
The 'bone should respond with data packets:
PING 192.168.7.2 (192.168.7.2) 56(84) bytes of data.
64 bytes from 192.168.7.2: icmp_req=1 ttl=64 time=2.19 ms
64 bytes from 192.168.7.2: icmp_req=2 ttl=64 time=0.152 ms
Press Ctrl+C to quit.
To test in the reverse direction, in the beaglebone terminal, enter:
ping 192.168.7.1
Connecting with SSH
The USB/Ethernet bridge can communicate with the PC using SSH, which is a network protocol for secure data communication.
To end the screen session in the beaglebone terminal, press Ctrl+A, k, which should take you back to the desktop prompt. To open an SSH session, enter:
ssh -X root@192.168.7.2
where 192.168.7.2 is the 'bone's IP address. The -X option enables X11 forwarding for graphical user interface support.
Press Enter or enter the password and you should see the beaglebone prompt.
To end the SSH session and return to the desktop prompt, in the beaglebone terminal, enter:
exit
For instructions on how to use the Ethernet connection to access the Internet, see the Internet Connection section of EBC Exercise 02 Out-of-the-Box, Bone:
http://elinux.org/EBC_Exercise_02_Out-of-the-Box,_Bone
Compiling and Running Programs
My tutorial Using Eclipse to Cross-compile Applications for Embedded Systems shows how to compile and run your own programs on the BeagleBone. I wrote the tutorial for the BeagleBoard-xM, but the instructions for the 'bone are the same except that in Part 4, you don’t have to set a static IP address.
Reloading the Mass Storage Device (optional)
If you want to reload the mass storage device on the 'bone, you need to unload the USB ECM gadget module and reload the Linux-USB File Storage Gadget module.
Because you'll be unloading the Ethernet driver, you need to be connected to the 'bone using the screen command.
If you have an open SSH connection in the beaglebone terminal, enter:
exit
screen /dev/ttyUSB1 115200
Now you can unload the Linux-USB File Storage Gadget module. In the beaglebone terminal, enter:
rmmod g_ether
Enter:
lsmod
g_ether should be absent.
To reload the Linux-USB File Storage Gadget driver, you need to assign a backing file that emulates a drive. This command assigns the same file the 'bone loaded on original bootup:
modprobe g_mass_storage file=/dev/mmcblk0p1
You should now be able to access the emulated drive at /media/BEAGLE_BONE on the PC again.
To reload the USB ECM gadget module, eject the emulated drive as described above in Unloading the Mass Storage Device and in the beagleboard terminal, enter:
rmmod g_mass_storage
modprobe g_ether